
티스토리 뷰
https://nuxt.com/docs/getting-started/installation
Installation · Get Started with Nuxt
Get started with Nuxt quickly with our online starters or start locally with your terminal.
nuxt.com
공식문서는 언제 변할지 모르기 때문에 명령어를 꼭 확인하자.
현재 내가 사용한 명령어
npx nuxi@latest init <project-name>
뭘로 설치할지 묻거든 npm을 선택한다.

깃쓸건지 물어봄 알아서하면됌

nuxi는 nuxt3에서 사용되는 공식 빌드 도구이다.
nuxt3이전에서 쓴 nuxt build 명령어도 사용은 가능하나 왠만하면 nuxi를 쓰는게 좋다. 공식 문서를 참고하는게 가장 좋음

build 명령어를 nuxi로 바꿔줌
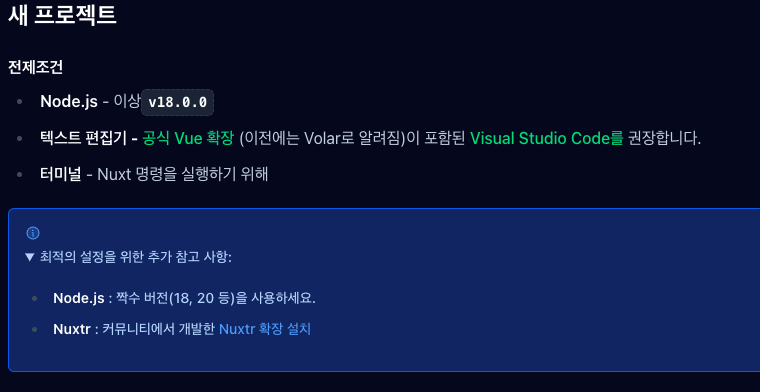
공식문서를 보면 최적의 설정을 위한 추가 참고사항이 있음
nuxtr은 깔지 않겠음.. 공부를 위해 하는 것임

ESLint, Prettier 설치
npm i -D eslint prettier eslint-config-prettier eslint-plugin-prettier eslint-plugin-vue eslint-plugin-nuxt @typescript-eslint/eslint-plugin @typescript-eslint/parser @nuxtjs/eslint-config-typescript
npx eslint --init
package.json script
  "lint": "eslint \"**/*.{ts,tsx,vue,js}\" --fix",
  "lint-eslint": "eslint --ignore-path .gitignore **/*{ts,tsx,vue,js,json} --fix",
  "lint-prettier": "prettier --write \"**/*.(ts|tsx|vue|js|json)\""
.eslintrc.cjs 파일 생성 (루트디렉토리)
module.exports = {
  root: true,
  env: {
    browser: true, // 브라우저 환경에서 실행
    node: true, // 노드 환경에서 실행
  },
  parser: 'vue-eslint-parser', // Vue.js 코드를 분석할 때 사용할 파서 지정
  parserOptions: {
    ecmaVersion: 'latest', // 최신 ECMAScript 버전 사용
    parser: '@typescript-eslint/parser', // TypeScript 코드를 파싱하는 데 사용할 파서 지정
    sourceType: 'module', // ECMAScript 모듈 형식으로 코드 작성
  },
  plugins: ['@typescript-eslint', 'vue'],
  extends: [
    'eslint:recommended', // ESLint에서 권장 규칙 (eslint)
    'plugin:nuxt/recommended', // Nuxt.js 권장 규칙 (eslint-plugin-nuxt)
    'plugin:vue/recommended', // Vue.js 권장 규칙 (eslint-plugin-vue)
    'plugin:@typescript-eslint/recommended', // TypeScript ESLint 규칙 (@typescript-eslint/eslint-plugin)
    '@nuxtjs/eslint-config-typescript', //  Nuxt.js 프로젝트에서 TypeScript와 함께 사용되는 ESLint 규칙 (@nuxtjs/eslint-config-typescript)
    'plugin:prettier/recommended', // ESLint, Prettier 충돌방지 (eslint-config-prettier, eslint-plugin-prettier)
  ],
  rules: {
		'no-console': 'off',
		'vue/html-self-closing': [
      'warn',
      {
        html: {
          void: 'always',
          normal: 'never',
          component: 'always',
        },
        svg: 'always',
        math: 'always',
      },
    ],
    'prettier/prettier': [
      'error',
      {
        arrowSpacing: ['error', { before: true, after: true }],
        singleQuote: true,
        semi: true,
        useTabs: false,
        tabWidth: 2,
        trailingComma: 'all',
        printWidth: 80,
        bracketSpacing: true,
        arrowParens: 'always',
        endOfLine: 'auto',
      },
    ],
  },
};
위코드는 모두 짐코딩이 제공한 것이다.
이제 익스텐션 eslint를 설치 해준다.
그후 setting > workspace > tab size 검색 >tab size 에 2넣으면

해당 폴더가 생성 된다 이곳에
{
  "eslint.enable": true,
  "editor.codeActionsOnSave": {
    "source.fixAll.eslint": "explicit"
  },
  "editor.tabSize": 2,
}
코드 복붙 한다음
코드 세이브를 하면 띄어쓰기 등의 빨간 줄이 사라진다.
'dev > Nuxt' 카테고리의 다른 글
| auto-imports.. Composables , types, emit 만들기 (1) | 2024.05.15 |
|---|---|
| vue3 with TypsScript (1) | 2024.05.15 |
| 라우팅 기본 : 파일 기본 라우팅 (0) | 2024.05.15 |
| Nuxt 컴포넌트 계층 (0) | 2024.05.13 |
| Quasar Ui Framwork 설치 (0) | 2024.05.13 |
공지사항
최근에 올라온 글
최근에 달린 댓글
- Total
- Today
- Yesterday
링크
TAG
- 백엔드 개발자 공부
- 스프링공부
- 인터셉터
- 항해플러스
- ArgumentResolver
- SpringBoot
- 예외처리
- JPA
- jpa api
- 백엔드 개발자 역량
- reject
- 향해99
- rejectValue
- 로그인
- 향해플러스백엔드
- 향해플러스
- 항해99
- Java
- exception
- BindingResult
- 리터럴
- thymleaf
- 컨트
- 스프링부트
- Intercepter
- HTTP
- react실행
- React
- filter
- hypertexttransferprotocol
| 일 | 월 | 화 | 수 | 목 | 금 | 토 |
|---|---|---|---|---|---|---|
| 1 | 2 | 3 | 4 | |||
| 5 | 6 | 7 | 8 | 9 | 10 | 11 |
| 12 | 13 | 14 | 15 | 16 | 17 | 18 |
| 19 | 20 | 21 | 22 | 23 | 24 | 25 |
| 26 | 27 | 28 | 29 | 30 | 31 |
글 보관함